Once an interview and the interviewer (Director) has been agreed by the Committee, a provisional Interviewee Record is created on the website (though it is not published or made public until it is complete and an Interview Number has been allocated.)
The Director is responsible for the entire interview process from planning, through production to post-production and ensuring it is ready and complete for publishing. Whilst flexibility and simplicity for users is important, the storage system and management processes have been designed with a focus on security of assets and control of access. The following information will help guide you through the process of updating and uploading relevant data without compromising the assets of the History Project.
1. Ensure that you are logged in to the website and have been given appropriate permissions.
2. To Edit the Interview Record on the HP website.
a) Go to the Interview Record for which you are responsible.
b) Click on the tab marked ‘Edit’. You can now edit all fields. Please follow any instructions provided, e.g. date formatting.
3. Media Management
For bandwidth control and security purposes, all media assets (images, audio, video, docs, pdfs, etc) for an Interview/Interviewee are stored on the HP Management Archive. Apart from the Interview Photos (which, as much smaller files, are uploaded onto the website from the Admin panel) all media files are linked or embedded from the Management archive and do not reside on the website. To add these files to the website, please do as follows:-
3.1. To Upload media assets to the Management Archive
a) Request access to the Upload Folder. (You will be sent a notification from Google.)
b) Upload your file. (If you have several, it will be tidier to first collect these into a single folder and then upload your folder).
Interviewee Photo
These are handled differently. Go to the relevant tab ‘Public – Main Photo‘. Upload the file from your computer. This should then be added to the files for upload to the Management Archive.
Other Photos and Documents
c) For Photos and Documents: To upload an Interviewee Photo: Go to the relevant tab ‘Public – Main Photo‘. Upload the file from your computer. This should then be added to the files for upload to the Management Archive.These s (to photos, documents, etc): Go the share link and select ‘all users)
c) To embed videos: Go to the embed link and select all users
Audio
Although audio files can be archived, there is a size limitation on streaming and playing audio files from within Google. Audio files must be archived with copies that have been converted to video so that they can be played in a standard video player (as an audio track). See instructions for video, below.
Video
For Youtube: Access to the Youtube account is for the Social Media, Comms or Admin teams only. (See: http://techwithlove.com/how-to-upload-videos-from-google-drive-to-youtube)
Video in Google Drive
- To embed the video locate your video and click on the video file link. The video page will open in a new window. To share the video with others you will need to modify the Sharing options (found in the File menu) and obtain the Embed code.
- You can see the video title and description which you can edit. Click on the Pop-Out icon. The video page will open in a new window.
- Click on ‘Share’ icon (bust and plus sign).
- You will now be on the page Share with Others. Click on ‘Advanced‘ (bottom right corner).
- You will now be on the page Sharing Settings. Under Who Has access, click Change. T
- You will now be on the page Link Sharing. Select ‘ON – Public on the Web‘ .Click Save.
- You wil now be returned to the page Sharing Settings. Select ‘Disable downloads to, print and copy’. Click ‘Done‘.
- ‘More Actions’ icon (square and arrow, second from far right).
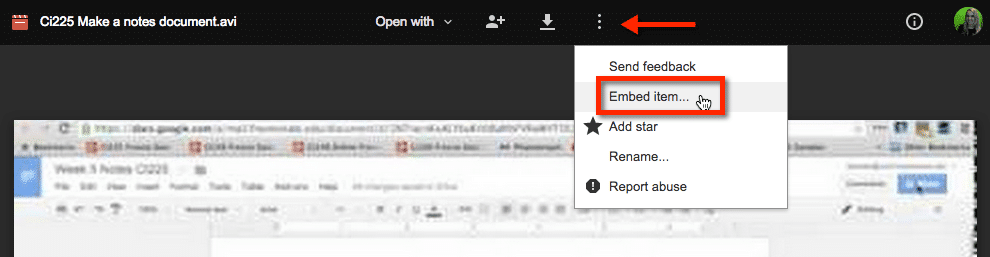
- Click on ‘Embed this video’ icon (three dots).
- Copy the embed code by clicking in the code box to highlight the code then copy (much like YouTube).
- This HTML code now need to be embedded. Go to your Interview Profile on the website, and in the admin find the ‘Full Interview recording tab’. Click on Source and paste in the Google Drive embed code previously copied.
Save your draft. View. - To change the size of the video simply change the width or height values within the parenthesis in two separate locations in the code. (Click Source to access this).
If you want to embed the video that is stored in your Google Drive you want to open the video from from Drive.

Double click to launch the video. The video shows in preview mode.
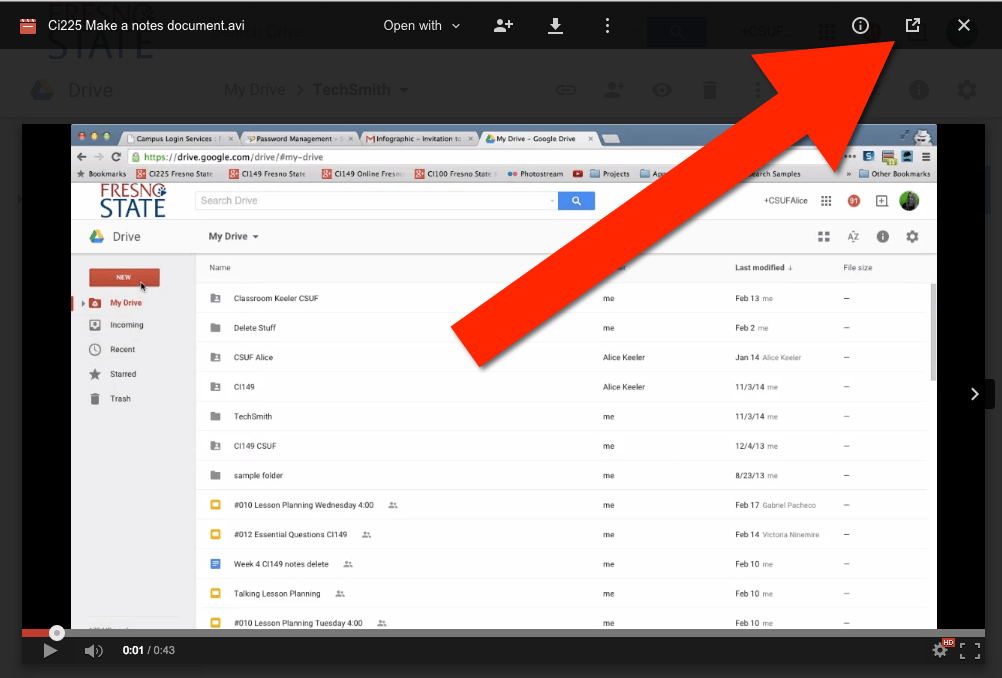
Pop Out
Along the top of preview mode are several settings and options. Find the pop out icon which is a square with an arrow coming out of it.
Embed Code
The 3 dots icon gives you more options. Clicking on this icon provides an option to “Embed item…” This provides the embed code for you to place on your website.